Sign In And Get Oriented
This tutorial helps you complete the first few minutes in Pharaoh: sign in, handle organization onboarding when it appears, confirm that the shell is healthy, and learn where account and organization controls live.
Before You Start
Section titled “Before You Start”- You need a Pharaoh user account.
- You should know which organization you expect to work in after sign-in.
- If your team uses more than one organization, expect to confirm the active organization from the user menu before you start operational work.
- If your organization has not finished mandatory onboarding, expect Pharaoh to keep you in
Organization Onboardinguntil profile and billing setup are complete. - If you do not yet have a Pharaoh user account, ask your organization administrator for an invitation link. Production-like environments do not expose open self-service registration from the login page.
Step 1: Open The Login Page
Section titled “Step 1: Open The Login Page”Go to the Login page.
What you should see:
- an
Emailfield - a
Passwordfield - a
Sign Inbutton - invite-only guidance telling you to use an administrator-provided invitation when registration is required

Before you type credentials, confirm that the page is asking for the organization-scoped Pharaoh account your administrator gave you. Use the password visibility control only when you need to verify local typing; it does not change the sign-in flow.
Validation errors stay inline with the fields that need attention. Fix the email format or missing password before you retry, because Pharaoh will not leave the login page until the form is valid and the credentials are accepted.

Step 2: Correct Credential Errors
Section titled “Step 2: Correct Credential Errors”If Pharaoh rejects the sign-in attempt, the page shows a Login Failed banner and keeps you on the same screen so you can correct the details and try again.

When you see this message, re-check the email address first, then re-enter the password. If the account should exist but still fails, stop and ask your administrator to verify the invitation or account state before trying unrelated workflows.
Step 3: Sign In And Check For Onboarding
Section titled “Step 3: Sign In And Check For Onboarding”After a successful sign-in, Pharaoh either sends you to Home or routes you into Organization Onboarding.
You see onboarding when the current organization still needs mandatory setup. The onboarding page is a full-page flow outside the normal sidebar shell. Direct links to protected console pages return to onboarding while mandatory setup is incomplete. The billing setup route is allowed from the onboarding billing step so an authorized operator can complete payment setup and then return to onboarding for the status check.
Required steps:
Profile: enterFirst name,Last name,Job title,Organization name,Company size, andIndustry.Billing: activate billing or wait for an owner or billing manager to do it.
Optional steps can be skipped and handled later from the main console:
Endpoint setupTeam invite
If you are invited into an organization that already completed its organization-level profile and billing setup, Pharaoh does not make you repeat those completed organization steps. If your personal profile fields are still missing, Pharaoh can still ask you to complete them before you enter the console.
For detailed steps, use Complete organization onboarding.
Step 4: Land On Home
Section titled “Step 4: Land On Home”The first page to check is the Operations Snapshot card. It shows:
- overall service status
- environment name
- database status
- the time of the last successful health check
If the status panel looks stale or unavailable, use Retry health check before assuming the platform is unhealthy.
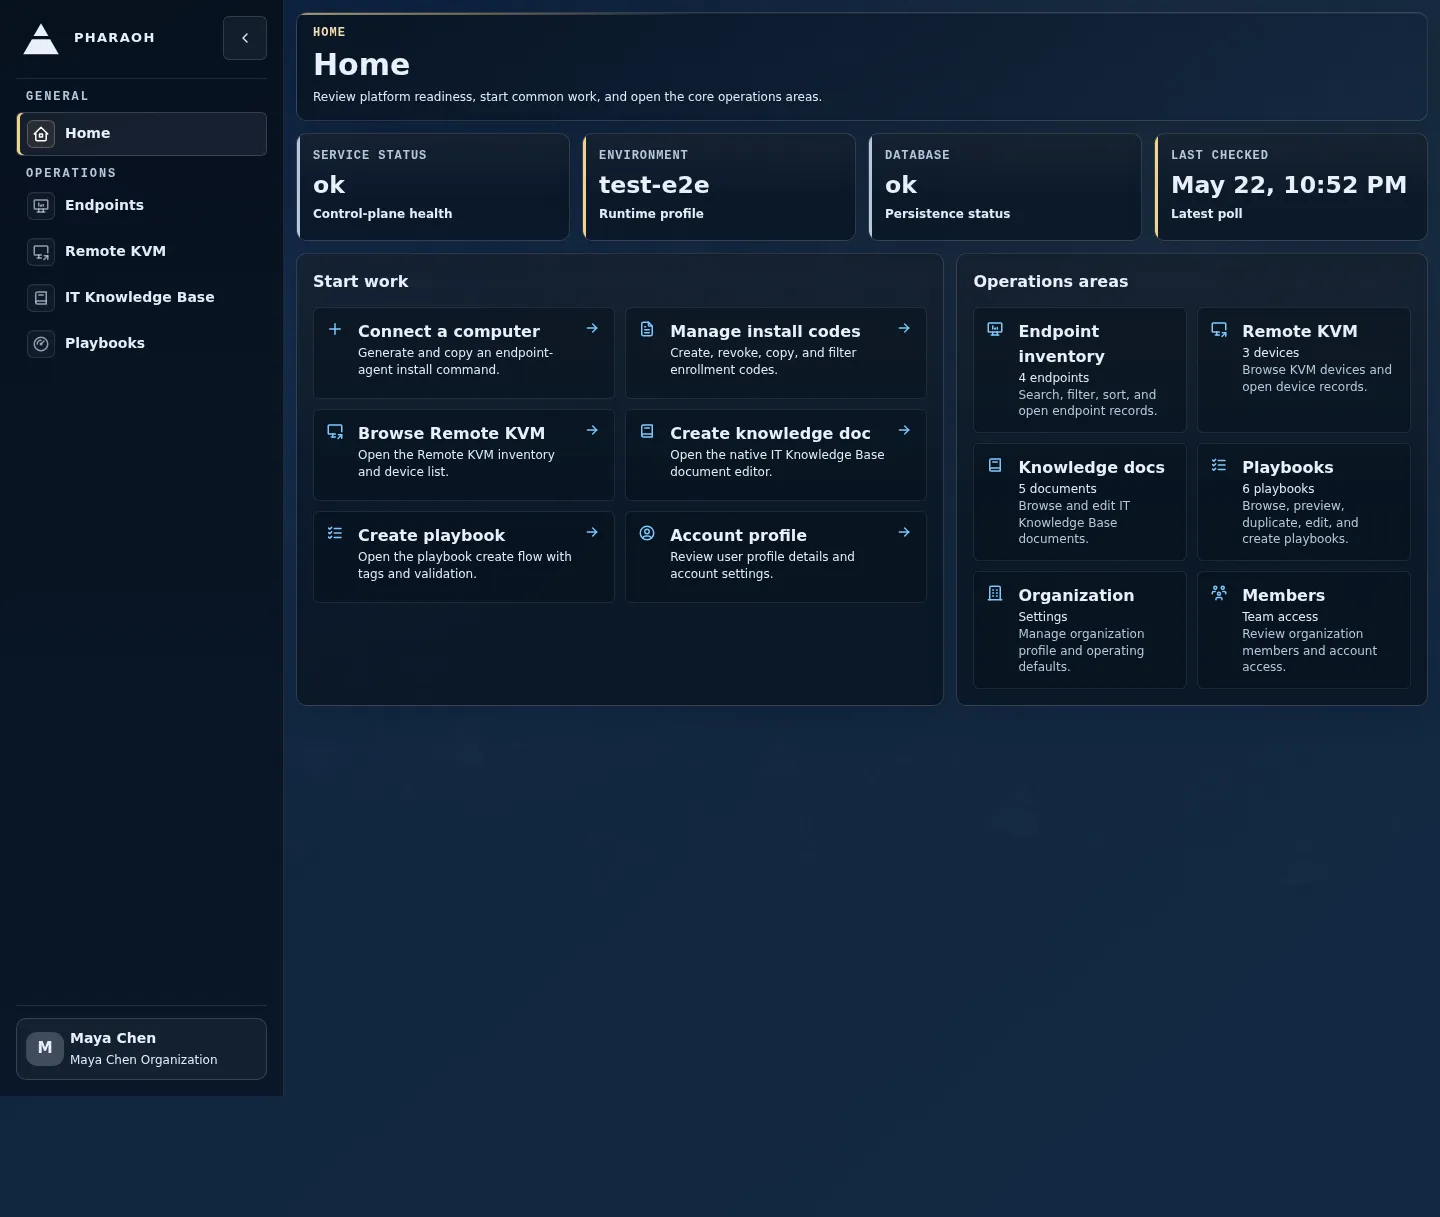
Step 5: Learn The Shell Landmarks
Section titled “Step 5: Learn The Shell Landmarks”The authenticated shell is consistent across the main operator console.
Look for these landmarks:
- Left sidebar: the main navigation groups and links such as
Home,Endpoints,IT Knowledge Base, andGuardrails - Breadcrumbs: the path at the top of each page, starting from
Home - User menu: the button showing your display name and current organization
The breadcrumb trail is the fastest way to confirm where you are when you open a deep page from a link or saved URL.
Step 6: Check Your Current Organization
Section titled “Step 6: Check Your Current Organization”Open the user menu in the top-right corner.
What you can confirm there:
- the signed-in email address
- the
Current Organization - whether other organizations are available to switch into
- direct links to
Organization SettingsandUser Profile
If you are in the wrong organization, switch before starting endpoint or policy work. The account pages reflect the current session context, so checking this early prevents confusion later.
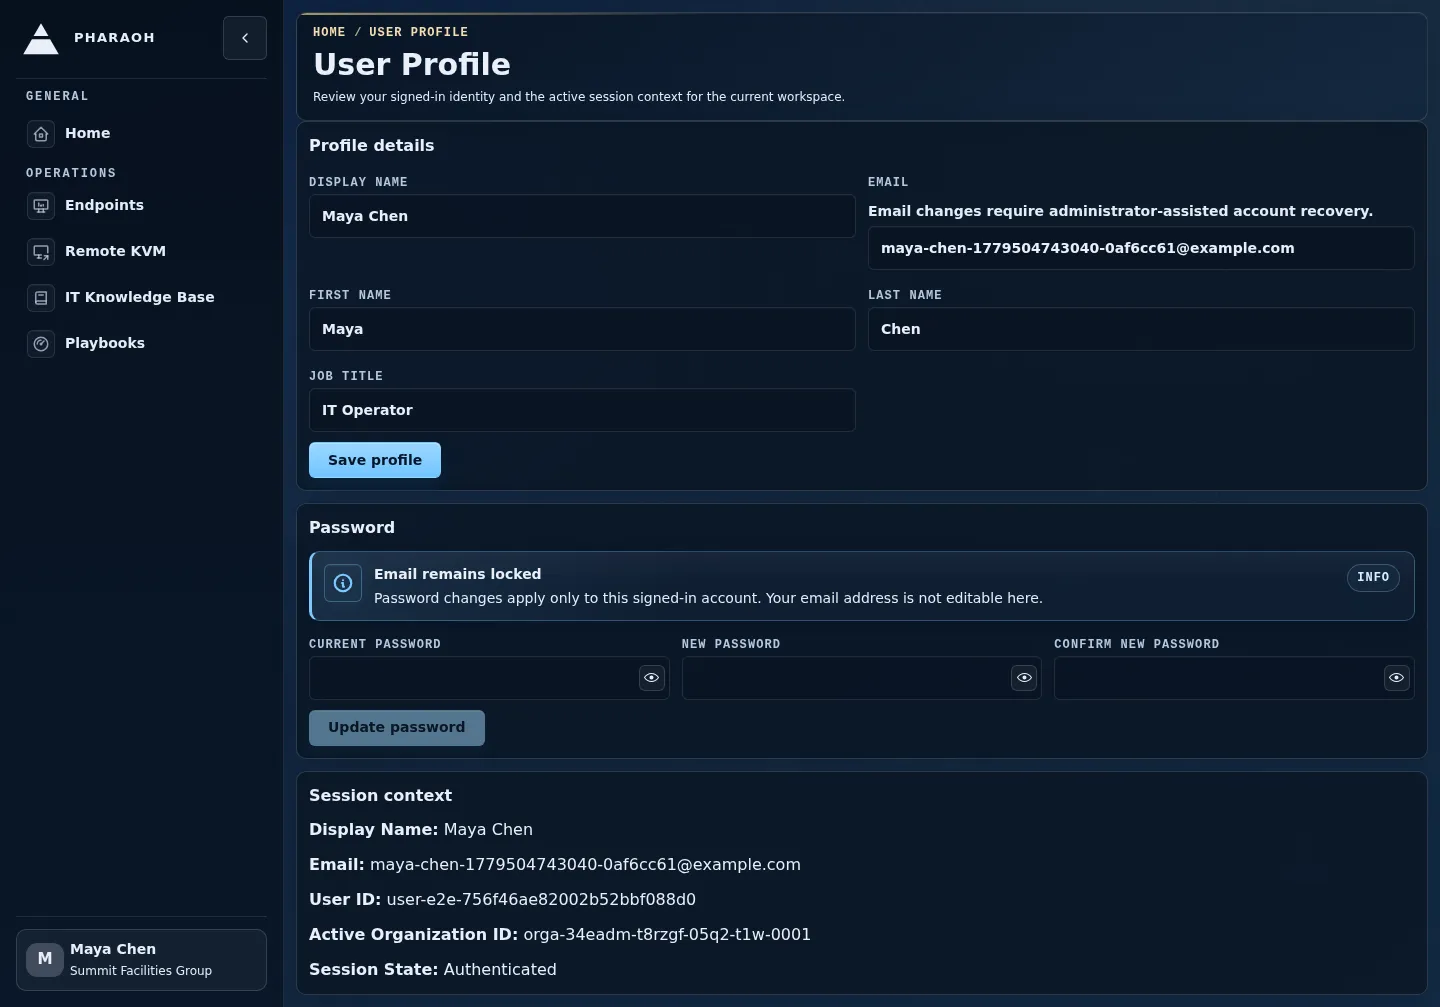
Step 7: Open Your User Profile
Section titled “Step 7: Open Your User Profile”From the user menu, open User Profile.
Use this page to compare the signed-in identity with the account you expected to use. The Session context panel is the quick confirmation that Pharaoh considers the session authenticated and attached to an active organization.
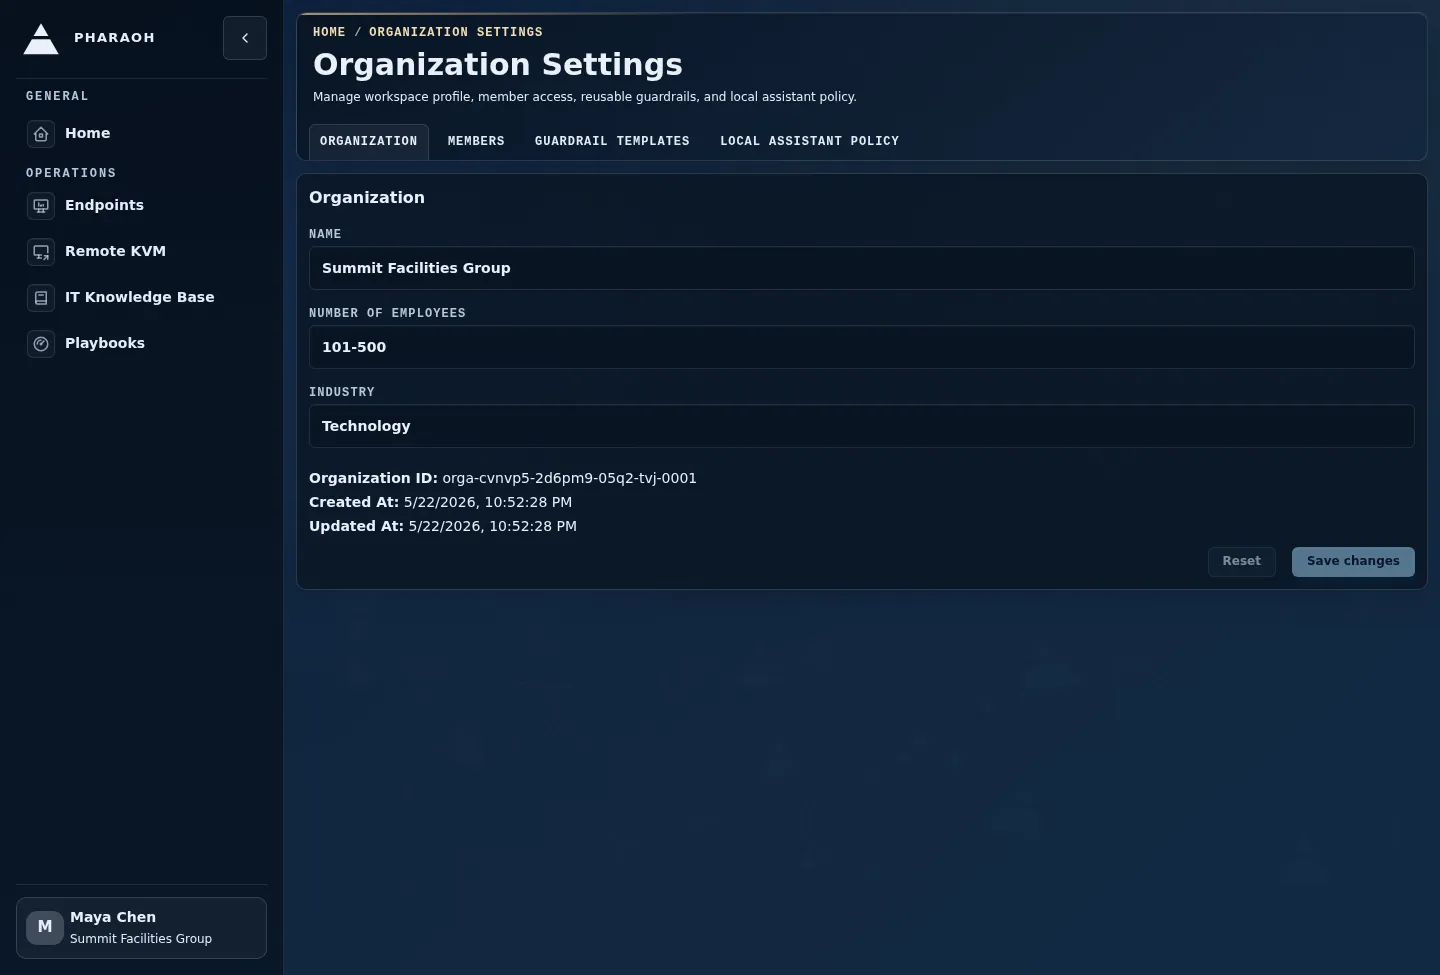
Step 8: Open Organization Settings
Section titled “Step 8: Open Organization Settings”From the user menu, open Organization Settings.
Use this page to confirm the active organization name, organization ID, and member list before you create or review operational data. The member table is especially useful when you need to confirm that the tenant you are viewing matches the team you are about to support.
What Success Looks Like
Section titled “What Success Looks Like”You are ready to continue when all of the following are true:
- you can sign in without unexpected validation or credential errors
- you know whether onboarding is required for the active organization
Homeloads and showsOperations Snapshot- you know how to open the user menu
- you can find
User ProfileandOrganization Settings - the current organization shown in the menu matches the organization you expect to manage